Sweet and Savory Salad Ideas

After a weekend filled with corned beef sandwiches, lucky charms puppy chow (who knew that was a thing!?), and a few green beers to celebrate my favorite holiday, Sunday evening brought desperation for something that was going to NOT make me feel like all I wanted to do was sleep. I allowed myself to enjoy some junk food this weekend but in all honesty – I definitely felt it as the weekend came to a close. My body was begging me for some nutrients so my husband and I chose to put together our own salad bar filled with our favorite toppings for Sunday night dinner. I feel like if you add the ‘bar’ aspect to any meal it instantly makes it more fun! We enjoyed shopping for our fixings and came home to assemble our bowls before sitting down to watch a movie. 

It’s no surprise as to what our individual salads looked like – Bryan always chooses a sweeter salad and my choices are definitely on the savory side. He enjoys fresh and dried fruit, nuts, a more tart cheese, and vinaigrette dressings when it comes to his favorite salads and mine are always chocked full of veggies, usually a protein like chicken or turkey pepperoni pieces, avocado (naturally), and creamier yogurt based dressings. We love chopping up everything at once and picking and choosing what to put on top. It’s a HUGE misconception that the only way to eat healthy is to eat salads – but it sure is an easy way to make sure you’re getting you’re getting your fruits and/or veggies, especially after a weekend of not-so-good food choices. The bonus is that recently we’ve found ways to make our salads bowls more interesting than just by adding the typical cucumbers, carrots, or croutons. Some of our recent go-tos include mini turkey pepperonis, Cheese Crisps by Fresh Gourmet (These are incredible because they have that crunch that you might like in your salads but since it’s simply baked cheese, there’s no carbs involved) , salsa, beans, different colored roasted peppers, or chopped apples.

Our ‘At Home Salad Bar’ also made for great leftovers for the next day’s lunches. We packed lunches at the same time we assembled our dinner and it was great getting to sit down knowing that lunches were already made – and we had very little clean-up (HUGE win in my book). 

I would be lying if I said I didn’t take a bite or two of Bryan’s salad. They were both SO good. Our bowls definitely left our tummies feeling full and my body was absolutely thanking me for giving it something that was NATURALLY colored green 😉 

Here are a couple salad ideas for you to try at home whether you are a sweet or savory type person!

Sweet Waldorf Chicken Salad

  • 1 cup chopped romaine lettuce
  • 3 oz shredded grilled chicken
  • 2 tbs dried cranberries (reduced sugar)
  • 2 tbs chopped walnuts or pecans
  • 1/2 chopped granny-smith apple
  • 1/2 cup green grapes (cut in half)
  • 2 tbs blue cheese crumbles
  • 2 tbs vinaigrette of your choice

Assemble all ingredients/toppings and enjoy!


Savory Roasted Veggie Salad

  • 1 cup chopped romaine lettuce
  • 3 oz shredded grilled chicken or lean ground beef
  • 2 tsp olive oil
  • 1/2 sliced red pepper
  • 1/2 sliced yellow pepper
  • 1/2 cup matchstick carrots
  • 1/2 avocado, diced
  • 1/2 cup diced cucumber
  • 2 tbs asiago or romano cheese crisps from Fresh Gourmet
  • 2 tbs blue cheese yogurt dressing from Bolthouse Farms (FAVORITE!)

Heat olive oil in a large skillet over low-medium heat and add peppers and carrots to skillet. Cook for approx 5 minutes or until veggies become soft. Top romaine lettuce with cooked chicken or ground beef, cooked vegetables, and remaining toppings. Enjoy!

 

Chicken + Veggie Fajitas

Have you ever had one of those weekends where you don’t feel like even making the move from the bed to the couch in the morning much less planning meals and cooking? I definitely had one of those weekends though I was lucky that my only plans were my favorite plans- spending time with my family. We celebrated my cousin Kaitlyn’s 30th birthday at the Atwater Restaurant inside the Herrington Inn located in Geneva, IL. The day was filled with re-telling family stories, photo props, a delicious cake, and celebrating one of my favorite people in this world. The delicious brunch + mimosas didn’t hurt either. 😉

I wasn’t feeling too well Saturday evening (Assuming the food hangover from brunch) so Hubs and I put on some comfy clothes and headed over to my in-law’s house to see my sister-in-law who was in town from Michigan. I am lucky to have such wonderful in-laws that I enjoy spending time with. We played cards, watched ‘Finding Dory’, and indulged in my Mother-in-Law’s famous pumpkin bars. It was truly the perfect Saturday. 

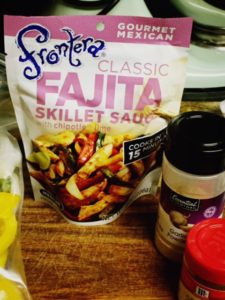
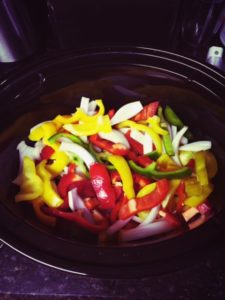
Sunday morning my plans involved a quick workout & finding a way to talk my husband in to helping me put up the Christmas decorations. I couldn’t wait any longer to see my Nutcracker collection on the shelves. Everything is up now except for the tree- that comes this weekend 🙂 After tidying up our little condo and arranging and re-arranging my decor, I didn’t feel like going to any extreme lengths to cook. It was turning out to be such a relaxing weekend I didn’t want that to end. Luckily, I had everything I needed to put together one of my favorite dishes that also makes a lot of leftovers- a bonus on Thanksgiving week. These simple chicken + veggie fajitas combine a lot of flavor with very few ingredients. Heck- if you even CALL them ingredients. I love being able to dump everything in to my crockpot and serve when ready. Also, I am definitely a big fan of sweet peppers and I like using all the different colored peppers. These fajitas are perfect to serve as a ‘bar’ with your favorite toppings- sour cream, salsa, avocado, black beans, etc. are all good choices. We kept it simple last night and used some light sour cream. The key to this dish is finding the perfect combination of flavor/marinade for your chicken. I have used canned green chilies, tomatoes, and a few spices before. While good- I didn’t get the ‘fajita’ feel. Luckily, a few weeks ago, I found a perfect solution. I found that Frontera Kitchen makes skillet sauces for various Mexican dishes. Taco, Enchilada, and Fajita sauces are all available and I plan on purchasing quite a few of them. My dad used to love Chef Rick Bayless’ cookbooks and I always think of him when I use one of their many delicious salsas. While this is technically a ‘skillet sauce’, I thought I could use it as a marinade and eventually cook the fajitas in it in the Crockpot. I am glad I did because this, combined with a little cumin and extra garlic powder ( I can never have enough garlic), made me feel like these had just come off a flaming plate at a restaurant. Hubs loved it and I look forward to having leftovers this week. I will say, this does make a LOT of leftovers if you’re only feeding two people at a time, so if you’re looking to make a smaller batch, consider cooking them on the stovetop instead of the Crockpot. 

What are your favorite/easy foods you like to make leading up to big holiday meals? 

image1image2


Chicken and Veggie Fajitas
Serves 8
Write a review
Print
Cook Time
4 hr
Cook Time
4 hr
Ingredients
  1. 2 Large Green Peppers
  2. 2 Large Red Peppers
  3. 2 Large Yellow Peppers
  4. 2 White Onions
  5. 2 Lbs Boneless Skinless Chicken Breast
  6. 1 Package of Frontera Fajita Skillet Sauce
  7. 1 tsp garlic powder
  8. 1 tsp cumin
  9. 2 tsp salt
  10. 8 large low carb flour tortillas
  11. Any extras you'd like for fajitas.. sour cream, salsa, black beans, and of course- avocado.
Instructions
  1. 1. Place skillet sauce, cumin, salt, garlic powder, and chicken in a large Ziploc bag and marinate in the refrigerator for 2 hours
  2. 2. Cut peppers and onions in large strips and place in fridge until ready to cook.
  3. 3. Place chicken + marinade mixture and veggies in Crockpot and cook on high for 4 hours.
  4. 4. Drain Chicken + Veggie mixture
  5. 5. Serve with two warm tortillas and toppings. Enjoy!
Sweet T and a Honey B https://www.sweettandahoneyb.com/

Peanut Butter Blossoms

 img_3455 

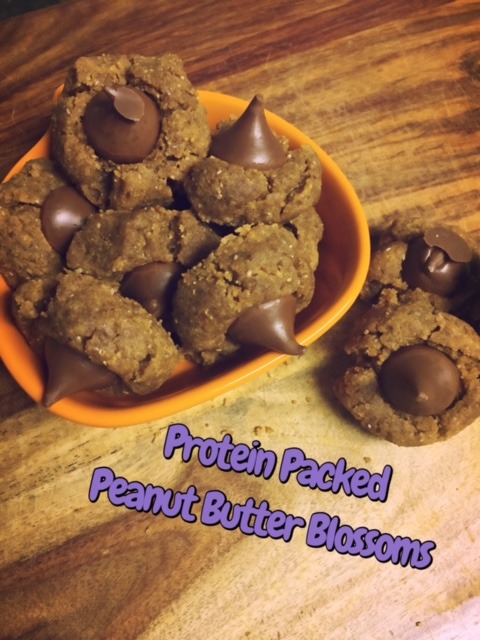
Have you ever had one of those days where you have a sudden craving for something you haven’t had in quite some time? Friday was one of those days. Lately, my team at the office has been experimenting with strange/weird combinations of cookies and treats (Candy Corn and Peanuts…Red Velvet Oreos… Butterscotch M&Ms…) which means there has been a lot of sugar hanging around our cubicles. All of this cookie talk on Friday left me thinking more about baking my own treats and less about actual work as it got closer and closer to 5 o’Clock. 

I was looking for something to bake that didn’t take much time and I that I already had most of the ingredients for in my baking cabinet. I developed a sudden taste for something peanut butter related and naturally the first thing that came to mind was Peanut Butter Blossoms. It’s a timeless cookie and would definitely satisfy my sweet tooth. 

In the spirit of taking some of the guilt out of these cookies, I decided not to use any flour. I have seen numerous recipes that completely eliminated the flour out of these cookies and that still looked delicious. In addition to this, I decided to add a ground flax/chia seed blend to the dough-an ingredient I have recently become obsessed with adding to a lot of my baked goods. This blend packs a lot of protein (even more than nuts) and also delivers a dose of heart healthy Omega 3’s.  Hodgson Mill Brand makes a relatively inexpensive blend that is easy to incorporate in many recipes. 

This recipe also makes about 4 dozen cookies so it’s a perfect treat to keep on hand for any weekend get-togethers. 🙂 

Peanut Butter Blossoms
Yields 4
A classic cookie packed with lots of protein.
Write a review
Print
Prep Time
10 min
Cook Time
8 min
Prep Time
10 min
Cook Time
8 min
Ingredients
  1. 2 Cups Organic Light Brown Sugar
  2. 2 Cups (1 Jar) Smuckers Natural Creamy Peanut Butter
  3. 1/2 Cup Hodgson Mill Ground Flax/Chia Seed Blend
  4. 2 Eggs
  5. 2 tsp Vanilla Extract
  6. 48 Hershey's Kisses
Instructions
  1. 1. Preheat oven to 350 Degrees.
  2. 2. Mix Peanut Butter, Flax/Chia Seed Blend, Brown Sugar, Eggs, and Vanilla until ingredients become dough-like.
  3. 3. Use a regular sized cookie scoop (or roll tablespoon balls) and place on a lightly greased cookie sheet (I used coconut oil cooking spray).
  4. 4. Using a metal spoon, very lightly pat down tops of balls of dough to flatten just a little bit.
  5. 5. Bake for 8 minutes
  6. 6. Immediately after baking, gently push one Hershey's Kiss in to the center of each cookie.
  7. 7. Let cookies fully cool before serving
Sweet T and a Honey B https://www.sweettandahoneyb.com/

A La’ Wonderful

img_3429


Last week, the temperature dropped below 75 degrees and I saw the first yellow leaf on the tree outside my balcony window. Within minutes, I was burning a pumpkin candle and finding a place to put my new favorite Halloween decoration purchased from Kirklands- a metal ghost with a silly smile on his face and a trick-or-treat bag. A completely necessary purchase.

With all of the amazing things this time of year brings, heavier meals and desserts come with it. I am forever trying to make “normal” recipes just a little healthier and the fall and holiday seasons are no different. Luckily our most recent obsession can easily be incorporated in to many recipes, is sweet, and is good for you-Honeycrisp Apples! 

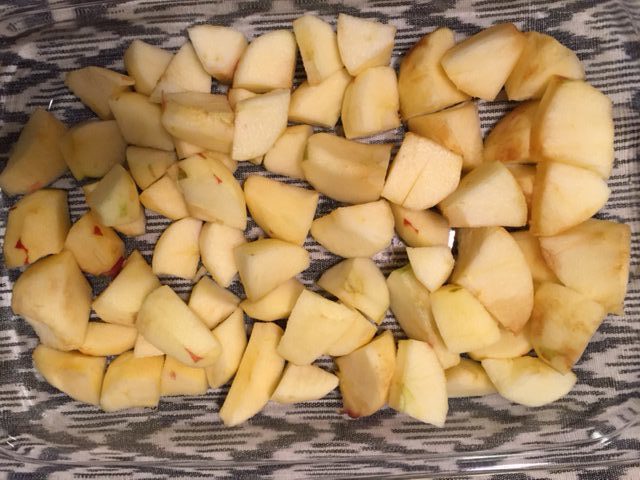
One evening last week, I decided I was going to make some baked apples using the multitude of apples I purchased. There are a ton of baked apple recipes out there and they usually involve a combination of a lot of brown sugar, oats, granola, raisins, etc-all of which I love. Though, all add a lot of Weight Watcher points for Bryan and I. I thought that a few simple ingredients could be added while still making these apples just as tasty. Then, if I wanted to add a couple tablespoons of raisins and/or granola on top of my portion, I could. 

The apples themselves are to die for but perhaps the best part of this dessert was something Bryan and I discovered a few months ago. If you are an ice cream lover and haven’t tried Halo Top Ice Cream you are seriously missing out. They have a handful of flavors to choose from and they all taste like REAL ice cream. Bonus- the whole pint is only 240 calories. My favorite has to be the Birthday Cake flavor but I am excited to try their new S’more Flavor! Check out all the flavors (including the 10 new ones!) here

Pop these apples in the oven and enjoy with 1/2 cup of Vanilla Halo Top. I look forward to making this delicious dessert all season!


img_3431-1 img_3395 img_3393

Baked Apples A'La Mode
Serves 5
A dessert perfect for fall evening
Write a review
Print
Prep Time
15 min
Cook Time
20 min
Prep Time
15 min
Cook Time
20 min
Ingredients
  1. 5 Large Honeycrisp Apples (peeled and diced)
  2. 2 tbs Honey
  3. 1/4 Cup Brown Sugar
  4. 2 tbs cinnamon
Instructions
  1. Preheat the oven to 350 degrees
  2. Place peeled and diced apples in a large 9/13 baking dish
  3. Sprinkle apples evenly with honey, sugar, and cinnamon
  4. Bake for 20 minutes and serve warm with 1/2 cup of Vanilla Halo Top!
Sweet T and a Honey B https://www.sweettandahoneyb.com/

A Twist on the Meatball Sub

img_3333


Everyone’s refrigerator door is stuffed with various condiments, dressings, and sauces that they bought for a recipe one time and never had to use again (I can’t be the ONLY one that has 8 salad dressings in the fridge, right?). However, the one thing that is on constant rotation is buffalo sauce. Most Weight Watcher friendly recipes don’t call for a lot of extra sauces-usually they pack the most points due to fat, sodium, carbs, and sugar so we pay close attention to these labels. Buffalo Sauce is not the worst in general-but one day Bryan and I stumbled upon Bulliards Buffalo Style Chicken Wing Sauce and now we don’t use any other brand. It’s got 1g Fat and 380mg of Sodium per Tbs. While the sodium isn’t ideal, it’s less than anything we have found. 

Last fall, we discovered that we could make our own meatball sub sandwiches and stay within our points. It was great until I read all of the artificial ingredients that were in the frozen bags of meatballs we bought every other week. A big lesson Bryan and I have learned from being on WW for the last 5+ years is that less points doesn’t ALWAYS mean less artificial additives in food. We love the flexibility of the program and that on a busy evening we can still choose something “quick” (ie; heat up those frozen meatballs), but 99% of the time try our best to pay attention to the ingredients as well as the nutrition label. Long story short-I needed to figure out how to make my own tasty buffalo style meatballs. 

My husband took the first bite of his sandwich, closed his eyes, and said a gargled “OERRGHHMYYGUURDD” we are all familiar with when we taste something we love . I knew I had succeeded. I think next time I might try these on top of a salad with a little light blue cheese dressing, cucumbers, and shredded carrots to eliminate the bread. You can even place these on top of a small bowl of quinoa. I love when I can make a huge batch of something, freeze it, and use it for different meals as it prevents us from getting bored. This is an easy one that is sure to please even the pickiest of game-day meatball sub eaters 🙂 


Buffalo Chicken Meatball Subs
Serves 7
A tasty twist on a traditional meatball submarine with a little bit of spice!
Write a review
Print
Prep Time
20 min
Cook Time
18 min
Prep Time
20 min
Cook Time
18 min
Ingredients
  1. 1lb Lean Ground Chicken or Turkey
  2. ¼ cup dried breadcrumbs
  3. ½ tbs Garlic Salt
  4. 1 tsp pepper
  5. 1 egg
  6. 3 tbs Buffalo Sauce
  7. ½ cup Chopped Onion
  8. ¼ cup blue cheese crumbles
  9. 6 Small Submarine Rolls
  10. Additional blue cheese crumbles and buffalo sauce for sandwiches
Instructions
  1. 1. Spray a baking sheet with non-stick cooking spray (Again, I used Pam’s Coconut Oil spray).
  2. 2. Preheat oven to 400 degrees.
  3. 3. Combine breadcrumbs, egg, onions, blue cheese, garlic salt, and pepper in a large mixing bowl.
  4. 4. Add ground chicken and mix well.
  5. 5. Roll in to 1-1 ½ inch balls and place on baking sheet.
  6. 6. Bake for 16-18 minutes or until cooked all the way through
  7. 7. Once cooked, place 3 meatballs on a small sub roll and sprinkle each sandwich with a tablespoon of blue cheese crumbles and a tablespoon of buffalo sauce. Serve with baby carrots and cucumbers.
Sweet T and a Honey B https://www.sweettandahoneyb.com/