Happy Halloween!
I can’t believe it’s already the last day of October and that we are jumping in to the last part of the year. Halloween begins my favorite time of year for many reasons. The holidays are fast approaching and there is always an excuse to get together with family and friends. Holiday traditions are so important to me and I am enjoying the fact that Bryan and I can share in each other’s own traditions now.
This past weekend was the perfect Halloween weekend. I was so excited to wake up early on Saturday and surprise Bryan with some pumpkin chocolate chip bread. I consider myself lucky that I have a husband that buys in to the pumpkin craze as much (and sometimes more!) than I do. I used a recipe from SistersMarie, a lifestyle blog written by my cousins, Kaitlyn Agnew and Lisa Fergus. I often find myself spending hours reading through their words and this recipe for Pumpkin Chocolate Chip Bread definitely caught my eye this weekend. You can find the recipe here. Kaitlyn and Lisa always provide the best recipes, ideas for home decor, and fashion inspiration.
After filling the house with the smell of warm pumpkin bread (Bryan woke up not long after, his nose directed him straight to the kitchen) we turned on Hocus Pocus and it officially felt like Halloween. We also finally got around to one of my favorite traditions- painting pumpkins! We purchased our pumpkins from Bengston’s Pumpkin Farm in Homer Glen, IL last week. There are endless pumpkins to pick from in all shapes and colors. We picked medium-sized traditional ones with long stems to paint. In addition to picking our pumpkins at Bengston’s, Bryan, myself, and two of our friends watched pig races and ate warm apple cider donuts. It was a perfect fall evening and I look forward to going back next year. I painted a friendly vampire and Bryan painted an angry looking Chicago Bears player.


Saturday night we attended a Halloween Party at a friend’s house and everyone brought a dish to share. A lot of the guest list had chosen to bring a dip of some sort so I decided to bring something to cure everyone’s sweet tooth for when the Taco Dip and tortilla chips were long gone. I could not write a blog centered around finding the ‘sweet’ in each day without mentioning my absolute favorite sugar cookie recipe. While most of the time I am finding ways to make everyday recipes just a bit healthier, I am a firm believer in the word ‘moderation’. Without allowing yourself to experience that chocolate cupcake you’ve been thinking about for weeks or in this case, the adorable cookies at this weekend’s Halloween Party, you’re likely to resent those healthy foods all together. This is the most important lesson I learned from WW.
This recipe is from Marian at Sweetopia.Net and is my go-to for various holiday cookies. I have made many Christmas cookies out of this recipe as well as McDonald’s themed cookies complete with the Golden Arches for my office after a long week at work. The most important part of this recipe is to make the dough well before baking the cookies. The recipe says to chill dough for at least an hour before baking but I decided to premake my dough on Thursday night. I rolled, cut, and baked the cookies on Friday night and decorated with homemade royal icing on Saturday morning. The longer the dough chills, the less the cookie spreads while in the oven. This is key in holding the cookie’s shape.
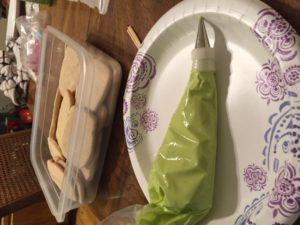
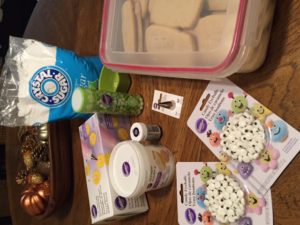
I love using Wilton’s disposable piping bags to decorate cookies.
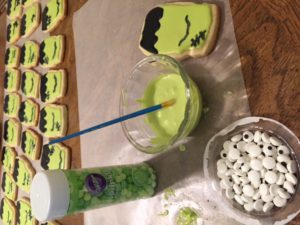
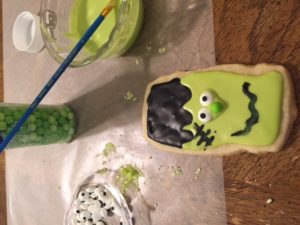

The cookies turned out great and so did our costumes. We went as Squints and Wendy Peffercorn from ‘The Sandlot’. One of the most clever costume themes I saw was from three girls each dressed as Salt, Lime, and Tequila. Though my favorite belonged to my friend, Lexi, who went as Elliott from ET. I give her a lot of credit because it was an obvious struggle carrying the milk carton around all evening, but it was worth it because she won the costume contest.


I hope your Halloween Weekend was filled with lots of good friends and good treats!
- 2 cups unsalted butter (at room temperature)
- 2 cups sugar
- 2 large eggs
- 3 tsp vanilla
- 5 cups all purpose flour
- 1 tsp salt
- 2 tbsp meringue powder (sold at Wilton)
- 1/4 cup water (plus more for thinning)
- 4 cups powdered sugar
- 1 tsp vanilla extract
- Cream the butter and sugar together in the bowl of an electric mixer on low to medium speed. (Use the paddle attachment). Mix until thoroughly incorporated - for about one minute. Scrape down the sides of the bowl with a plastic spatula and mix again for a few seconds more.
- Over mixing the butter and sugar in this step will cause too much air to be incorporated into the dough. If you'd like a light and fluffy cookie, that's ideal, however the dough will spread more during baking; not ideal if you'd like the cookie to hold its shape.
- Add eggs slowly and mix. Scrape down the bowl with your spatula at least once and mix again.
- Cut open your vanilla bean and scrape the seeds out. Add to mixing bowl. Alternatively, add liquid vanilla extract. Stir briefly.
- Sift your dry ingredients together. (Flour, baking powder and salt).
- Add all of the flour mixture to the bowl. Place a large tea towel or two small tea towels between the edge of the bowl and the electric mixer so that the flour won't escape. Mix on low speed for 30 seconds. Remove the tea towels and observe the dough mixing; when it clumps around the paddle attachment it's ready. It's also important at this stage not to over mix the dough (the glutens in the flour develop and the dough can become tough).
- Roll the dough out between 2 large pieces of parchment paper. Place on a baking sheet and into the fridge for a minimum of 1 hour.
- Roll out the dough further if you need to, and cut out cookie shapes. Place on parchment paper-lined baking sheet. Re-roll scraps and repeat.
- Put cookie dough shapes back into the fridge for 10 minutes to 1 hour to chill again. They will then hold their shape better when baked.
- Preheat your oven to 350°F or 176°C.
- Bake cookies for 8-12 minutes or until the edges become golden brown (I found that I needed the full 12 minutes, if not, a bit more because my cookies were larger)
- Let cookies cool to room temperature and decorate!
- In a large bowl, whisk together meringue powder and water until a slight foam forms.
- Add in powdered sugar and vanilla and mix until icing becomes light and airy, about 2 minutes.
- If the mixture is too thick and not mixing well, add more water, 1 tbsp at a time.
- If adding coloring, separate in to smaller bowls and mix with desired food coloring.
