All Wrapped Up

Merry Christmas Eve! This morning begins my two most favorite days of the year and while there is still a lot to be done before I host Christmas Eve for our families and pack up the presents for tomorrow’s festivities, I hope to get a few minutes every now and then to step back from the craziness and enjoy everything I love about Christmas (including helping myself to a large sample of the chocolate covered pretzels I make every year.. 😉 )

While my list of favorites during Christmastime is never ending, picking out my wrapping paper/tissue/ribbons for the year and actually wrapping the presents would be near the top. There’s something about a perfectly wrapped present (or a gazillion) for our family and friends under our little tree that puts me in the mood. I swear I could sit for hours wrapping presents in front of ‘It’s A Wonderful Life’ for the 19th time on ABC Family (Refusing the ‘freeform’ name. Is anyone else annoyed by this?). 

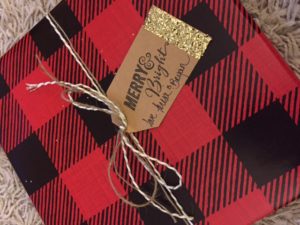
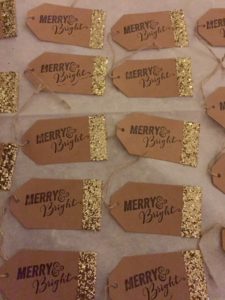
This year, I wanted to add a little creativity to my gift tags. It takes a little longer than the sticky tags, but it was totally worth it and added a personal touch to each gift. I was all about brown paper, plaid, twine, and a little gold glitter this time around. I picked out some plain kraft paper gift tags (here) to decorate. I wandered over to the stamp aisle to look at the Christmas stamps and picked one that says “Merry & Bright” (one of my favorite lines during Christmas). I had a black ink pad at home as well Modge Podge and some (Okay, A LOT) of leftover loose gold glitter from DIY’ing my wedding decor. 

I love the look of just a small amount of glitter added to something plain to make it pop. I sponged a very small amount of Modge Podge on to the end of each tag and then dipped it right away in to the glitter. After letting them dry overnight, I used my new stamp. From there, I wrote who the present was for/from with a thin black Sharpie pen. It took just minutes longer than the normal stickies (I still used some of those too! I found ones that matched my plaid paper 🙂 ) and the gifts are all sparkling under the tree. I have a lot of the kraft tags leftover so with a couple different colors of loose glitter these are perfect to save for birthdays or showers too! 
My chocolate is melted and the pretzels are ready for dipping so it’s time for that sampling before the craziness begins. I hope you have a truly wonderful holiday spent with your family and friends. Merry Christmas!

–TB
The Little Blue Hutch

It’s probably pretty easy to think of a handful of things that remind you of your childhood home- a smell, a sound, a tradition, or even a piece or furniture or decoration. Chances are these things are part of your most vivid memories growing up. For me, it is the creaky sound the section of floor right in front of my parent’s bedroom made when I stepped on it. I would always step over it when I wanted to get up early and not wake them. Or, how every Thanksgiving or Christmas, my mom would be up early cooking and I would wake up to the smell of the pistachio cake she was making to bring to the party. The sounds of Johnny Mathis would always be playing on our computer. 

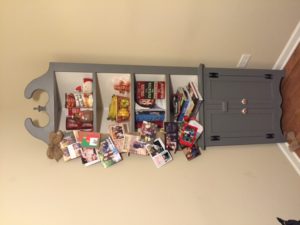
While the creaky floor, the smell of her Pistachio cake, and Johnny Mathis will always be part of my favorite memories, perhaps the most precious item was a piece of furniture that I never gave much thought to growing up- a little blue hutch that sat in our dining room. This hutch always held random odds and ends- cookbooks, pottery I made as a preschooler, salt and pepper shakers, and some crystal my Grandfather used to collect that got passed down to my Mom. She bought this for our first condo before I was even born and eventually traveled with us to our first home on the north side of town. Five years after that it came with us to the house I would spend most of my life in. It always sat in the corner and was very rarely touched or changed. Though, when I look at pictures of every family party we hosted- no matter what house- it’s always in the background. 

This past summer, a year and a half after my husband and I moved in to our first home, we were still in search of a few perfect pieces of furniture to complete some empty walls and corners. It just so happens that my mom was in the process of moving out of the home I grew up in. It was an emotional process to say the least, but the house was getting to be too much for her to handle and I was so happy that she was moving in with the man she loved. In the midst of finally getting around to taking what I wanted from the house, I also picked out a few items I would love to see in my own home. A wooden rum crate used for comfy throw blankets, our over-sized coffee table, and the blue hutch all became ours. It’s amazing that these three pieces were exactly what we were looking for and didn’t even know it. I love sitting in our living room looking at these things that were part of my memories of the house on Washington Street. 

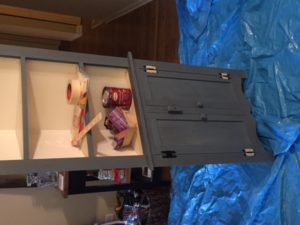
While the hutch fit perfectly, I won’t lie that it looked a little worn. The paint was dull and the bright blue color didn’t go with much in our house. I knew I wanted to give a little life to it. After a trip to Home Depot to find the perfect color paint, I wanted to get started right away. 


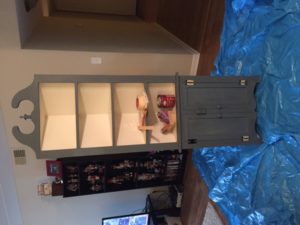
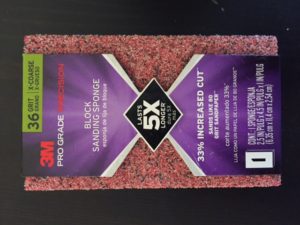
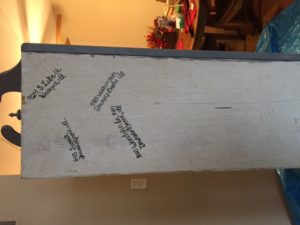
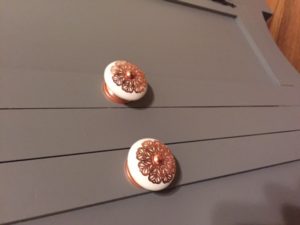
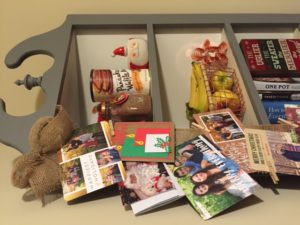
My original idea was to take an electric sander to it, however I didn’t know if it would hold up. The wood is pretty fragile. Luckily the stormy gray color I picked was not all that different from the original blue. All I needed was a coarse sanding sponge by 3M to sand off the first layer by hand and two coats of the new paint to make it look new again. After painting, I picked out a few accessories to dress it up even more. I found an adorable rose gold colored fruit basket with a wood trim at Anthropologie. I also selected some new knobs at World Market to replace the plain ones on the cabinets. Again- in rose gold. As a final touch, I wrote the addresses of each of the places this little hutch has sat in on the back. Each time we move, and take it with us, I will be reminded of how many places I have called home. 

Luckily it also happens to be Christmastime and I needed somewhere to display our Christmas cards. A little leftover burlap and some tiny clothespins made this in to a perfect display for our cards this season.

It’s amazing what a few hours of time, some carefully selected decorations, and two coats of paint can do to an old piece of furniture. I was so excited when I could place my completed project in the corner of our own dining room. To all my friends who have moved or are in the process of moving out of the house where they grew up-I highly suggest asking for a piece of that home to go with you. It can turn in to a fun and rewarding project, fill that empty corner because nothing else seemed ‘just right’, and help create new memories. 


–TB


Banana Chocolate Chip Walnut Breakfast Bread

It’s 1 day until Thanksgiving. Can anyone else not believe this? As I have mentioned, November begins my favorite time of year. Between work, teaching dance, doing a complete clean out/purge around our condo, doctor appointments, and beginning Christmas shopping, etc November went fast. As I get older, I realize more and more around this time of year it is important to slow down and appreciate quiet time.

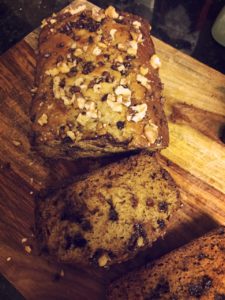
Though I promised myself I would sleep in today (Thank goodness for time off), I was hoping I could sneak in some alone time before Hubs woke up. Sometimes my favorite mornings involve enjoying the quiet, baking something that will make the house smell amazing, and surprising Bryan with it when he wakes up. His nose usually directs him right to the kitchen 😉 This morning is no different. I had everything in the pantry to make this delicious Banana Chocolate Chip bread extra special to kick off the holidays. 

I was perhaps most excited to start my morning lighting my favorite candle (chocolate scented! How perfect?), enjoying my annual display of nutcrackers, and wait for the smell of the bread to fill the condo. 


img_3591 img_3592 img_3593


This little Chef is one of my most cherished items I own. It has become a special tradition in my family that each of the girls receive their own Chef when they become engaged and have their first home thanks to my Aunt Lynda. Even if it’s a dinner for Bryan and I, I always make sure to update my Chef with what’s in the oven for the day. 

I am definitely adding this breakfast bread to my lengthy list of what I am thankful for this year (and always). I hope that your Thanksgiving is filled with love, laughs, and lots of mashed potatoes. 

-TB


Banana Chocolate Chip Walnut Breakfast Bread
Write a review
Print
Cook Time
40 min
Cook Time
40 min
Ingredients
  1. 1 + 1/2 tsp baking soda
  2. 1/2 tsp fine sea salt
  3. 1 + 1/2 cups all purpose flour
  4. 2 eggs
  5. 1/2 cup plain fat free greek yogurt
  6. 1/2 cup light brown sugar, packed
  7. 1/4 cup maple syrup + extra for drizzling
  8. 2 ripe bananas
  9. 1/2 cup mini chocolate chips
  10. 3 tbs chopped walnuts for topping
Instructions
  1. 1. Preheat oven to 350 degrees and grease a 9x5 loaf pan.
  2. 2. Combine baking soda, seat salt, and flour in a large mixing bowl.
  3. 3. Whisk eggs in a medium sized mixing bowl
  4. 4. Add bananas, greek yogurt, maple syrup, and brown sugar to eggs and mix
  5. 5. Combine wet ingredients with dry ingredients. Don't overmix!
  6. 6. Gently fold in mini chocolate chips
  7. 7. Pour batter in to the greased loaf pan and place in oven.
  8. 8. After about 25 minutes, take pan out of oven, drizzle some maple syrup over the top, and sprinkle crushed walnuts and a few more chocolate chips on top too.
  9. 9. Lightly cover the pan with tinfoil and bake for the remaining 15 minutes.
  10. 10. Bread is done when you insert a toothpick or fork comes out clean.
  11. 11. Let cool for 15 minutes before slicing and serving.
Sweet T and a Honey B https://www.sweettandahoneyb.com/

Chicken + Veggie Fajitas

Have you ever had one of those weekends where you don’t feel like even making the move from the bed to the couch in the morning much less planning meals and cooking? I definitely had one of those weekends though I was lucky that my only plans were my favorite plans- spending time with my family. We celebrated my cousin Kaitlyn’s 30th birthday at the Atwater Restaurant inside the Herrington Inn located in Geneva, IL. The day was filled with re-telling family stories, photo props, a delicious cake, and celebrating one of my favorite people in this world. The delicious brunch + mimosas didn’t hurt either. 😉

I wasn’t feeling too well Saturday evening (Assuming the food hangover from brunch) so Hubs and I put on some comfy clothes and headed over to my in-law’s house to see my sister-in-law who was in town from Michigan. I am lucky to have such wonderful in-laws that I enjoy spending time with. We played cards, watched ‘Finding Dory’, and indulged in my Mother-in-Law’s famous pumpkin bars. It was truly the perfect Saturday. 

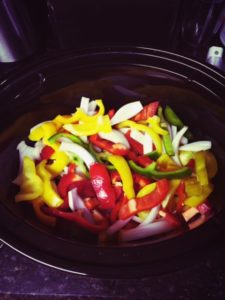
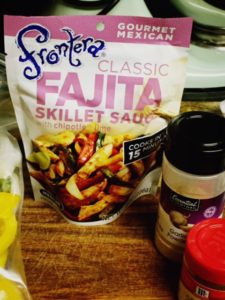
Sunday morning my plans involved a quick workout & finding a way to talk my husband in to helping me put up the Christmas decorations. I couldn’t wait any longer to see my Nutcracker collection on the shelves. Everything is up now except for the tree- that comes this weekend 🙂 After tidying up our little condo and arranging and re-arranging my decor, I didn’t feel like going to any extreme lengths to cook. It was turning out to be such a relaxing weekend I didn’t want that to end. Luckily, I had everything I needed to put together one of my favorite dishes that also makes a lot of leftovers- a bonus on Thanksgiving week. These simple chicken + veggie fajitas combine a lot of flavor with very few ingredients. Heck- if you even CALL them ingredients. I love being able to dump everything in to my crockpot and serve when ready. Also, I am definitely a big fan of sweet peppers and I like using all the different colored peppers. These fajitas are perfect to serve as a ‘bar’ with your favorite toppings- sour cream, salsa, avocado, black beans, etc. are all good choices. We kept it simple last night and used some light sour cream. The key to this dish is finding the perfect combination of flavor/marinade for your chicken. I have used canned green chilies, tomatoes, and a few spices before. While good- I didn’t get the ‘fajita’ feel. Luckily, a few weeks ago, I found a perfect solution. I found that Frontera Kitchen makes skillet sauces for various Mexican dishes. Taco, Enchilada, and Fajita sauces are all available and I plan on purchasing quite a few of them. My dad used to love Chef Rick Bayless’ cookbooks and I always think of him when I use one of their many delicious salsas. While this is technically a ‘skillet sauce’, I thought I could use it as a marinade and eventually cook the fajitas in it in the Crockpot. I am glad I did because this, combined with a little cumin and extra garlic powder ( I can never have enough garlic), made me feel like these had just come off a flaming plate at a restaurant. Hubs loved it and I look forward to having leftovers this week. I will say, this does make a LOT of leftovers if you’re only feeding two people at a time, so if you’re looking to make a smaller batch, consider cooking them on the stovetop instead of the Crockpot. 

What are your favorite/easy foods you like to make leading up to big holiday meals? 

image1image2


Chicken and Veggie Fajitas
Serves 8
Write a review
Print
Cook Time
4 hr
Cook Time
4 hr
Ingredients
  1. 2 Large Green Peppers
  2. 2 Large Red Peppers
  3. 2 Large Yellow Peppers
  4. 2 White Onions
  5. 2 Lbs Boneless Skinless Chicken Breast
  6. 1 Package of Frontera Fajita Skillet Sauce
  7. 1 tsp garlic powder
  8. 1 tsp cumin
  9. 2 tsp salt
  10. 8 large low carb flour tortillas
  11. Any extras you'd like for fajitas.. sour cream, salsa, black beans, and of course- avocado.
Instructions
  1. 1. Place skillet sauce, cumin, salt, garlic powder, and chicken in a large Ziploc bag and marinate in the refrigerator for 2 hours
  2. 2. Cut peppers and onions in large strips and place in fridge until ready to cook.
  3. 3. Place chicken + marinade mixture and veggies in Crockpot and cook on high for 4 hours.
  4. 4. Drain Chicken + Veggie mixture
  5. 5. Serve with two warm tortillas and toppings. Enjoy!
Sweet T and a Honey B https://www.sweettandahoneyb.com/

Taco Bout’ a Salad

img_3414


If you know me, you know that I am a huge fan of anything with avocado, black beans, and the overall ‘southwest’ feel. Most restaurants have their own version of a ‘Southwest Chicken Salad’ and it’s often on my list of go-to meals. Though, most restaurants load them up with a ton of cheese and sour cream in order to pack in a lot of flavor. In my opinion, you can just as much flavor with just a little healthier ingredients. 

Last week, I had a craving for one of these salads. I found myself with leftover barbecue chicken from a previous night and decided it would be a delicious way to add some protein with a little extra ‘kick’. I love that this salad is cold and refreshing, yet combines the warm chicken to make it more of a comfort meal. My husband and I made our (large!) salads and sat down to some Thursday Night Football. You can’t have football night without a good meal to go with it. 🙂


Barbecue Chicken Taco Salads
Serves 4
Write a review
Print
Ingredients
  1. 1 Lb. Boneless Skinless Chicken Breast
  2. 1/2 cup barbecue sauce
  3. 4 cups romaine lettuce
  4. 1/2 cup frozen baby corn
  5. 1/2 cup black beans
  6. 1/2 cup canned green chiles
  7. 1/2 cup diced roma tomatoes
  8. 1 avocado
  9. 8 tbs tortilla strips
  10. 8 tbs yogurt based ranch dressing
Instructions
  1. 1. Marinate chicken breasts in barbecue sauce in a large Ziploc bag and place in the refrigerator for a few hours.
  2. 2. Bake Chicken for 45 minutes on 400 degrees.
  3. 3. Place baby corn, black beans, and green chiles in a small pot and cook for 8-10 minutes on low-medium heat.
  4. 4. For each salad, top 1 cup of romaine lettuce with 2 oz. of barbcue chicken, 1/4 of bean and corn mixture, 1/4 of diced roma tomatoes, 1/4 of avocado, 2 tbs of tortilla strips, and 2 tbs of the ranch dressing. Serves 4.
Sweet T and a Honey B https://www.sweettandahoneyb.com/